Syncing Supabase CLI to Your Project
Before deploying your application to production, it's crucial to sync your local Supabase development environment with your production Supabase project. This process ensures that all your local database migrations are applied to your production database.
Prerequisites
- Supabase CLI installed and configured locally
- A Supabase project created for production
- Access to your project's dashboard in Supabase
- Your project's reference ID (found in your project's dashboard settings)
Steps to Sync and Push Migrations
-
Navigate to Supabase Package
First, navigate to the Supabase package directory:
cd packages/supabase -
Link Your Local Project to Supabase
Link your local project to your Supabase project:
npx supabase link --project-ref your-project-refReplace
your-project-refwith your Supabase project's reference ID. You can find this in your project's dashboard under Settings > General > Reference ID.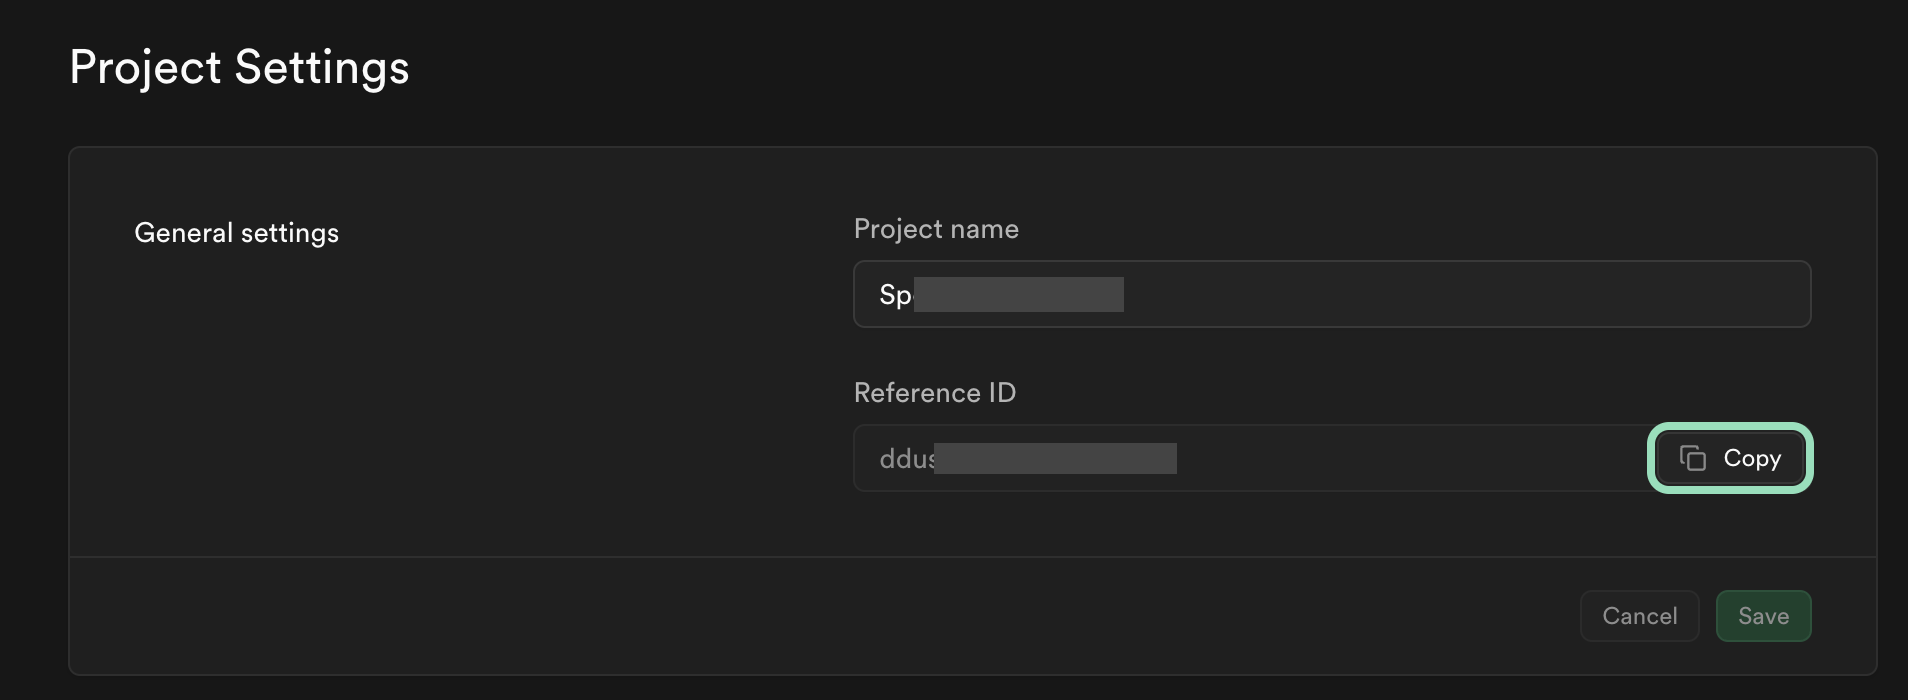
-
Push Local Migrations
Once linked, push your local migrations to the production database:
npx supabase db pushThis command will:
- Compare your local schema with the production schema
- Apply any pending migrations in chronological order
- Update the schema version in production
-
Verify the Changes
After pushing, verify that your changes have been applied correctly:
npx supabase db diffThis will show any differences between your local schema and the production schema. If everything was applied correctly, there should be no differences.
Best Practices
-
Version Control:
- Keep all migration files in version control
- Use descriptive names for migration files (e.g.,
20240315_add_user_roles.sql) - Include both
upanddownmigrations for reversibility
-
Testing:
- Always test migrations locally first
- Use a staging environment if possible
- Back up production data before applying major schema changes
-
Organization:
- Keep migrations in
packages/supabase/migrationsorganized by feature or date - Document complex migrations with comments
- Break large migrations into smaller, manageable pieces
- Keep migrations in
-
Deployment:
- Schedule migration deployments during low-traffic periods
- Have a rollback plan ready
- Monitor the database during and after migration
Common Issues and Solutions
Migration Conflicts
If you see conflicts between local and production schemas:
-
Run a diff to identify the differences:
npx supabase db diff -
Review the changes carefully and decide whether to:
- Keep the production changes and update local schema
- Override production with local changes
- Merge the changes manually
Connection Issues
If you're having trouble connecting:
-
Check your project reference:
npx supabase status -
Verify your authentication:
npx supabase projects list -
Review the logs:
npx supabase logs
Reset and Recovery
If you need to reset your local environment:
# Reset the local database
npx supabase db reset

# Pull the production schema
npx supabase db pull

# Start fresh with new migrations
npx supabase db push
Monitoring and Maintenance
-
Regularly check for drift between environments:
npx supabase db diff -
Monitor migration performance:
npx supabase db dump -
Keep track of applied migrations:
npx supabase migration list
By following these steps and best practices, you ensure that your production Supabase database stays in sync with your local development environment, maintaining consistency across your application.
Next Steps
After successfully syncing your database:
- Verify all RLS policies are correctly applied
- Test authentication flows in production
- Monitor database performance
- Set up automated backups
For more information, refer to the Supabase CLI documentation and Database Management Guide.