Login With Google
Setting up Google Cloud is crucial for implementing Google Sign-In and other Google services. Follow these steps:
-
Create a Google Cloud Project
- Go to Google Cloud Console.
- Create a new project or select an existing one.
-
Configure OAuth Consent Screen
- Go to "APIs & Services" > "OAuth consent screen".
- Choose "External" user type (unless your app is for internal use only).
- Fill in the required information about your application.
- Use ChatGPT prompts to generate content for your Terms of Service (/tos) and Privacy Policy (/privacy-policy) pages. These will need to be created within your project under
apps/web/app/our-privacy-policy/page.tsxandapps/web/app/our-terms-of-service/page.tsx. - Add your domain and
your-project-id.supabase.coas authorized domains. - Add
userinfo.emailanduserinfo.profileto the scopes. - Add yourself as a test user.
- Submit for review.
-
Create OAuth 2.0 Client ID
- Go to "APIs & Services" > "Credentials".
- Click "Create Credentials" > "OAuth client ID".
- Choose "Web application" as the application type.
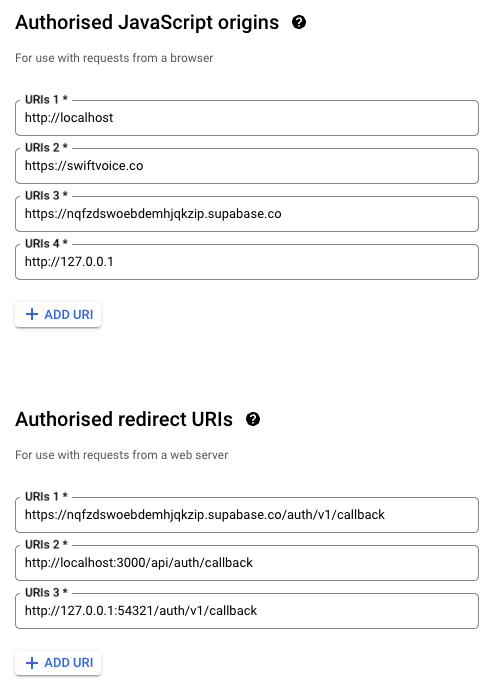
- Add authorized JavaScript origins:
http://localhost:3000(Next.js app)http://localhost:8080(Hono API)https://your-domain.com(replace with your actual domain)https://your-project-id.supabase.co(replace with your Supabase project URL)http://127.0.0.1:3000http://127.0.0.1:8080
- Add authorized redirect URIs:
https://your-project-id.supabase.co/auth/v1/callback(replace with your Supabase project URL)http://localhost:3000/api/auth/callbackhttp://localhost:8080/api/auth/callbackhttp://127.0.0.1:54321/auth/v1/callback
It should look like this:
-
Set Up Supabase with Google Auth
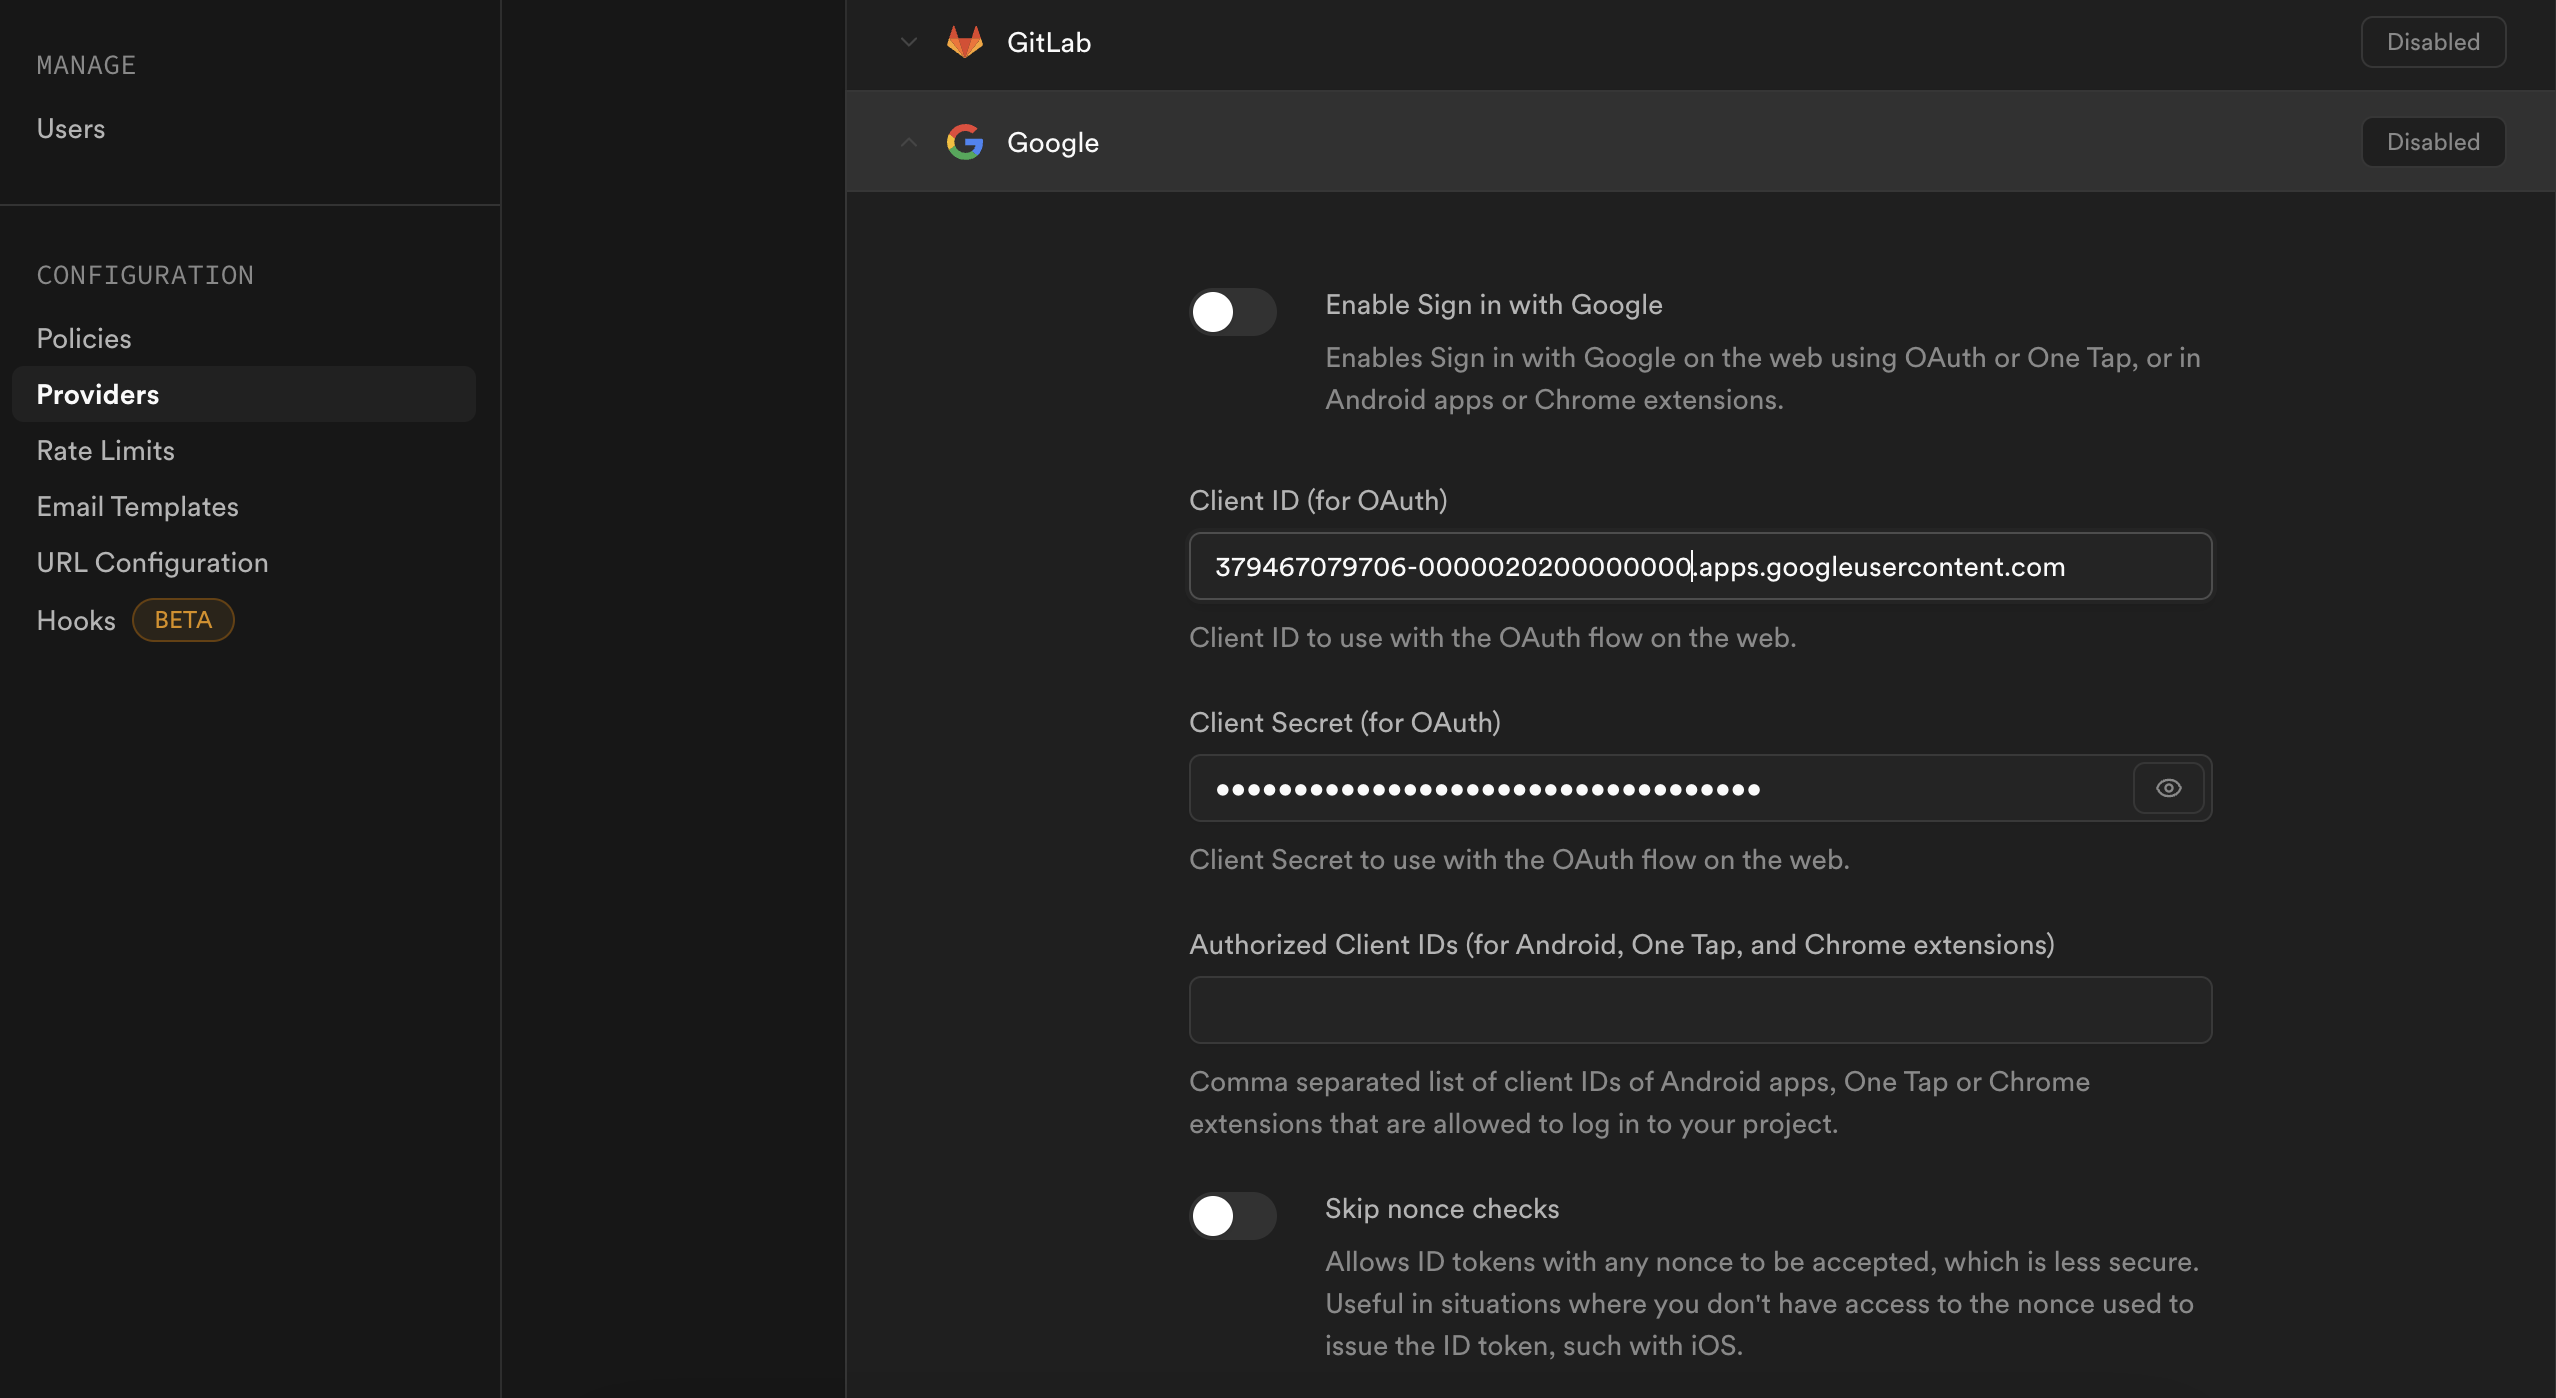
- Click the OAuth client you have just created under "OAuth 2.0 Client IDs".
- On the right-hand side, copy your Client ID and Client Secret.
- In your Supabase dashboard, navigate to Authentication > Providers > Google.
- Paste the Client ID and Client Secret into their respective fields.
-
Configure Environment Variables
Update your environment files with the Google OAuth credentials:
# apps/web/.env.local
NEXT_PUBLIC_GOOGLE_CLIENT_ID=your_google_client_id
NEXT_PUBLIC_GOOGLE_CLIENT_SECRET=your_google_client_secret

# apps/api/.env
GOOGLE_CLIENT_ID=your_google_client_id
GOOGLE_CLIENT_SECRET=your_google_client_secret

# packages/supabase/.env
GOOGLE_CLIENT_ID=your_google_client_id
GOOGLE_CLIENT_SECRET=your_google_client_secret -
Are we still in test mode?
- Go back to "OAuth consent screen".
- Ensure the publishing status is set to "Testing".
- We will publish our app later.
Note: You can use Google Sign-In on localhost immediately. For production, it will work but show a warning until your app is fully verified (which typically takes a few days).
Next Steps
- Set up Supabase locally for development
- Configure the database with your schema
- Run tests to verify your setup